Anonymizer Anti-Spyware™ 3.2 Help
Please refer to the instructions below to best utilize our
latest release of Anti-Spyware.
Introduction
Spyware is usually installed without your knowledge when you download free software
or click on banner ads when surfing the Internet. Spyware can determine your
passwords, credit card numbers, and more. It can lead to system crashes and
general computer instability.
Anonymizer Anti-Spyware safely detects and removes spyware and adware programs
from your computer and prevents them from returning. Automatic updates provide
maximum spyware protection.
Quick Start
Use Anonymizer Anti-Spyware in two easy steps:
1. Click the “Start Scan” button to scan your computer for spyware
and adware files.
2. When the scan is finished, click the “Remove” button to clean
your computer of these files.
Back to Top
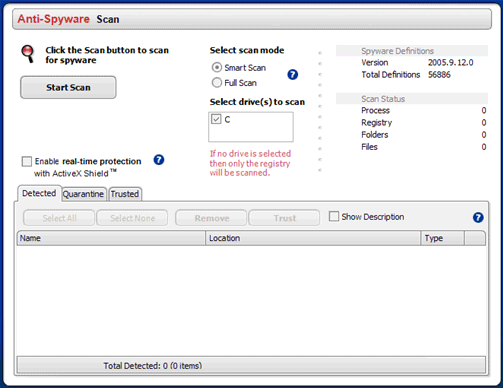
Scan Screen

The scan screen is the main program interface for Anti-Spyware which allows
you to control your application and keep your PC free of spyware and adware
programs.
Back to Top
Scanning
Click the “Start Scan” button to scan your
computer for spyware and adware files. The program will
load definition files first, which are needed to detect
spyware, before the actual scan begins. After the definition
files are loaded, the scan will begin automatically. As
Anonymizer Anti-Spyware progresses through the definition
loading and scanning process, you will see the progress
indicator rotating and the file display area below the
scan button.
Scan Mode

A Smart Scan is a fast way to search for spyware on your computer. Smart Scan
looks in the most common locations in the system registry and on your hard drive
for known traces of spyware. A Full Scan is, as the name implies, a more thorough
search that will take longer than a Smart Scan, checking every file on your
computer and evaluating them against our spyware definitions database.
. 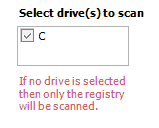
Drive Scan selection
If you have more than one hard drive on your computer, you can select it to
be included in a spyware scan. Simply check the box next to the drive. You can
also elect to do a minimal scan of your computer’s registry by unchecking
the drive boxes. This is still an effective, quick scan since a great deal of
spyware is commonly found in the registry.
Spyware Definitions

This section displays the date your software was last updated and the total
number of spyware definitions used by the program to detect spyware. Anti-Spyware
will automatically update the definition files when Anti-Spyware is launched.
You may also check manually for an update by clicking the “Update”
button on the Preferences screen.
Scan Status
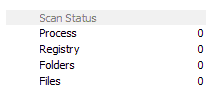
This section displays the areas of your computer that are checked during a
scan. Anti-Spyware first checks the running Processes, before moving on the
Registry. After that, if your hard drive is selected for scanning (link to Drive
Scan selection), Anti-Spyware will then scan all of the folders and files on
that drive.
Scan Completion
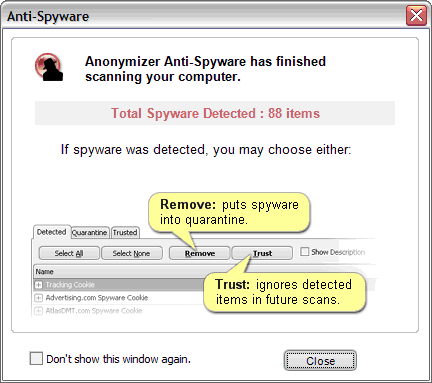
When a scan is complete, you’ll see this Scan Completion dialog. This
window is for your convenience, especially if you’ve minimized or hidden
the Anti-Spyware program during the scan. If you prefer not to see this dialog,
you may disable it by checking the “Do not display this window after a
scan” box.
Back to Top
Real-time protection

ActiveX applets allow applications to share information. ActiveX Shield™
provides real-time protection by blocking blacklisted, harmful applets, while
allowing safe applets to download to your computer. Checking this box prevents
installation of harmful ActiveX code on your computer. The box must be checked
and Anti-Spyware must be running for the ActiveX Shield to work.
Back to Top
Detected Tab
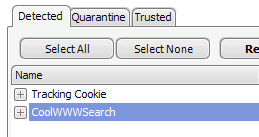
As you run a scan, spyware detected on your computer appears here in the Detected
tab. Once the scan is finished, in most cases you’ll want to select the
spyware items for removal by selecting “Remove”. If you want more
detail about your detected spyware, simply check the box next to “Show
Description.”
All items are automatically selected by default. You can use the “Select
All” or “Select None” buttons, or individual select spyware
items in the list by clicking the checkboxes. After you’ve made your selections,
the following actions can be taken against detected spyware:
• Click the “Remove” button: Removes the spyware and moves
it to protected folder to prevent it from further harm to your computer. (For
more info, see Remove tab)
• Click the “Trust” button: Ignores the selected item during
future scans so that it does not show in the Detected tab.
Back to Top
Quarantine Tab
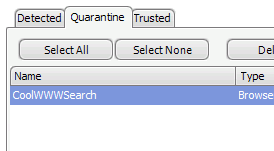
After you click the “Remove” button, the spyware displayed in the
“Detected” tab is disabled and moved to the Remove tab. When spyware
is quarantined, it is prevented from doing any further harm to your computer,
but is not completely deleted. Because removing spyware may sometimes cause
other problems for your computer, it is recommended that you leave spyware in
Quarantine for at least a week or so. When you’ve used your computer for
some time after quarantining and encountered no unusual problems, you can safely
delete the spyware in quarantine.
You can use the Select All or Select None buttons, or individual select spyware
items in the list by clicking the checkboxes. After you’ve made your selections,
the following actions can be taken against removed spyware:
• Click the Delete button: Completely removes the spyware from your computer.
As noted above, it is recommended that you delete spyware only after you’re
sure that your computer is behaving normally after quarantine.
• Click the Restore button: Removes the spyware from quarantine and restores
it to your computer. Restored spyware items will show up in the Detected tab
the next time you scan.
Back to Top
Trust Tab
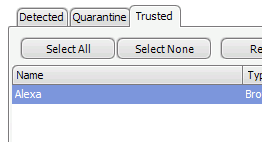
After you click the “Trust” button, selected
spyware in the Detected tab is ignored and will not appear
in future scans. Typically, you’d select this option
for programs that you recognize and want to keep using.
For example, many add-on browser toolbars are detected
as spyware because they commonly send information regarding
your surfing habits back to the toolbar company. They
may still provide a valuable service to you, so you probably
would want to select them as trusted programs.
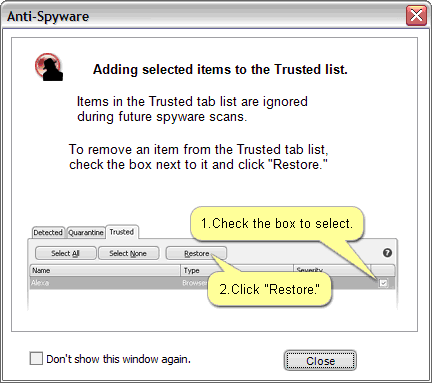
You can use the “Select All” or “Select None” buttons,
or individually select spyware items in the list by clicking
the checkboxes. Clicking the “Remove” button
will delete the spyware from the “Trust” tab;
it will be detected in future spyware scans.
Back to Top
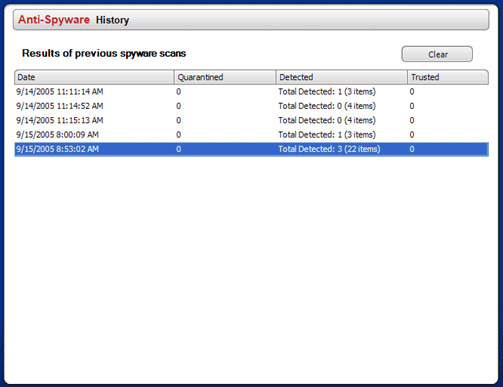
History Screen
The History screen keeps a record of the results from all of your previous
spyware scans. This records the date and time of each scan, along with the number
of items detected, removed, and trusted. The “Clear” button will
erase this history.
Back to Top
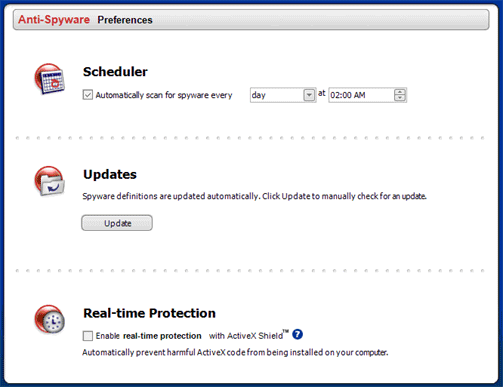
Preferences Screen
The preferences screen contains further options available for use with your
Anti-Spyware program.
The Scheduler allows you to set up spyware scans at daily, weekly or monthly
intervals. Simply check the box and select your interval and time settings.
Updates are usually done automatically when you start Anti-Spyware. But you
can manually check for an update simply by pushing the “Update”
button.
ActiveX Shield prevents installation of harmful ActiveX code on your computer.
The box must be checked and Anti-Spyware must be running for the Shield to work.
Back to Top


